
Easy kitchen backsplash ideas for budget renovations exist in a genuinely useful sweet spot between the $80 per square foot handmade tile installation that design magazines photograph and the peel-and-stick options that looked promising in the product photo and deeply disappointing on the actual wall. I have renovated kitchens on budgets that made contractors visibly uncomfortable, and the backsplash is consistently the area where creative problem-solving produces the most dramatic visual return per dollar. The ideas below range from genuinely free to a few hundred dollars, and several of them produce results that people with unlimited budgets choose specifically because they look better than the expensive alternatives.
Why the Backsplash Has Outsized Visual Impact in a Kitchen
The backsplash occupies the most consistently visible real estate in a kitchen because it sits at eye level, between the countertop and the upper cabinets, directly in the line of sight from both the cooking position and the room entry. A bedroom wall above the baseboard is often behind furniture. A bathroom wall is partially obscured by fixtures. The kitchen backsplash is unobstructed, at eye level, and visible from multiple angles simultaneously, which is why changing it produces a more dramatic visual shift per square foot than almost any other surface in the room.
The design variables that determine how a backsplash reads from across the room are color, pattern, texture, and the specific quality of light that the surface reflects or absorbs. A glossy white subway tile reflects light and makes the kitchen feel brighter. A matte terracotta tile absorbs light and makes the kitchen feel warmer. A patterned tile draws the eye and provides a focal point. A textured surface adds dimension that a flat surface cannot. Understanding which of these qualities your specific kitchen needs before selecting a backsplash approach produces better results than selecting a material first and hoping it suits the room.
Budget renovations specifically require understanding which of these visual variables produces the most impact per dollar in your specific kitchen context, because the answer is different for a dark kitchen that needs light reflection than for a bright kitchen that needs warmth, and different again for a kitchen that needs pattern to provide visual interest versus one that already has enough visual complexity and needs a calm, simple solution.
1. Peel and Stick Tile That Actually Works
Peel and stick backsplash tile has a reputation built on the cheapest versions of the product that deserved every negative review they received: thin vinyl sheets that bubbled at the seams, curled at the edges, peeled away from walls at the first hint of steam, and looked exactly like what they were within weeks of installation. The reputation does not apply equally to the current generation of quality peel and stick products that have genuinely improved.
The brands that produce reliably good results are not the ones sold in discount bins or in multipacks at dramatically low per-tile prices. Aspect peel and stick backsplash tiles in metal, stone, and glass mosaic formats at $8 to $15 per tile provide genuine material quality that reads as real tile from normal viewing distances. StickTILE and Tic Tac Tiles produce subway tile formats in ceramic-look and glass-look finishes that hold seams, resist steam, and maintain their appearance through the conditions a kitchen wall experiences.
Surface preparation is the specific variable that determines whether peel and stick tile succeeds or fails on any given wall, and it matters more than the brand or the specific product. The wall surface must be completely clean of grease, which in a kitchen means wiping down with a degreaser like Krud Kutter rather than just soap and water. It must be fully dry, which in a kitchen adjacent to a sink means waiting longer than feels necessary. It must be smooth enough that the adhesive makes full contact across the tile back, because air pockets under adhesive tile are where bubbling originates. Priming the wall with a bonding primer before application adds thirty minutes and $10 to the project and significantly improves adhesion longevity.
Layout planning before peeling anything is the second determinant of success: starting from the center of the most visible section rather than the corner prevents the asymmetrical layout where partial tiles at one end are much smaller than those at the other. Cutting with a sharp utility knife and a metal straightedge rather than scissors produces clean edges that read as genuine tile cuts rather than the slightly fuzzy edges that scissors create.
2. Traditional Subway Tile Installed as a DIY Project
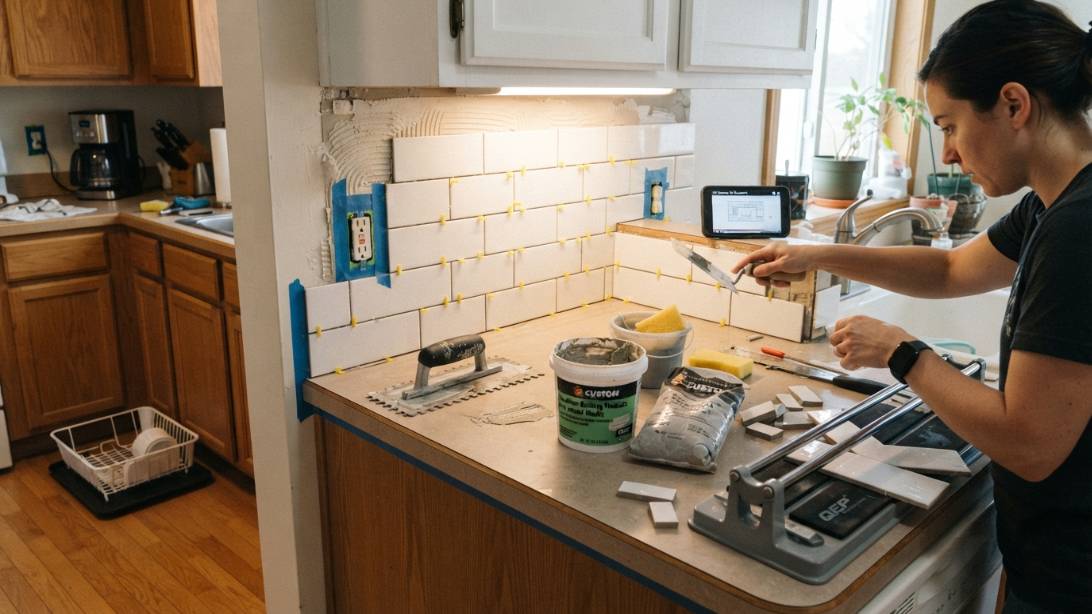
Traditional ceramic subway tile remains one of the best-value backsplash materials available at $1 to $4 per square foot for standard white three-by-six inch tiles, and the installation process is genuinely learnable by a first-time tiler who commits to watching several detailed tutorial videos and accepts that the first few tiles will not be perfect.
The material cost of a standard kitchen backsplash in basic white subway tile from Home Depot or Lowe’s runs $50 to $150 for materials including tile, mastic adhesive, grout, and spacers. The same backsplash installed professionally costs $400 to $1,200 in labor alone, which is the specific cost differential that makes subway tile DIY installation the highest-return skill investment in budget kitchen renovation.
The tools required are accessible rather than specialized: a notched trowel, a tile cutter or wet saw, tile spacers, a grout float, and sponges. A manual tile cutter at $25 to $40 handles straight cuts in standard ceramic tile without requiring the water management of a wet saw. A wet saw rental from Home Depot at $50 per day handles any cut the manual cutter cannot, including diagonal and L-shaped cuts. Neither requires significant training to use effectively for a backsplash project where the majority of cuts are straight.
The installation sequence that produces the best results starts with dry-laying the tile pattern on the counter before applying any adhesive, which reveals any layout problems before they are set in thinset. Apply mastic adhesive to the wall in small sections rather than the entire area at once, which prevents it from skinning over before the tile is placed. Press each tile firmly and wiggle slightly to ensure full contact with the adhesive. Use spacers consistently for grout line uniformity. Allow twenty-four hours before grouting. Apply grout with a float, remove excess with a damp sponge before it dries fully, and seal the grout after forty-eight hours with a penetrating grout sealer that prevents staining.
Easy Kitchen Backsplash Ideas for Budget Renovations Using Paint
Paint-based backsplash solutions occupy a specific budget bracket of almost free to very low cost that produces results ranging from surprisingly effective to genuinely beautiful depending on the specific approach and the quality of execution.
Painted Brick Effect With a Sponge
A brick pattern created with a rectangular sponge and two tones of paint produces a backsplash that reads as genuine painted brick from normal viewing distances at the cost of a sponge and two small paint samples.
Cut a rectangular kitchen sponge to a brick-proportioned size, approximately three inches by one and a half inches, using scissors or a utility knife. Mix a base color, typically a warm terracotta, warm gray, or cream, and a slightly darker or lighter accent color in the same family. Paint the wall in the base color and allow it to dry completely. Dip the sponge into the accent color, blot excess on a paper plate until the coverage is irregular rather than uniform, and press onto the wall in a staggered brick pattern using a level line as a guide for horizontal alignment. The irregularity of the sponge application produces the variation in color and texture that makes painted brick look convincingly hand-applied rather than mechanically produced. Seal the completed surface with a matte water-based polyurethane to protect it from kitchen splatter and moisture.
Chalk Paint Wash for a Limewash Effect
A chalk paint wash applied over an existing backsplash, whether painted drywall, existing tile, or brick, produces the specific cloudy, aged, European plaster quality of limewash at the cost of a can of chalk paint and thirty minutes of application.
Chalk paint from Annie Sloan at $40 to $45 per quart or Rust-Oleum Chalked at $12 to $15 per quart adheres to virtually any surface including existing tile, existing paint, and unprimed drywall without requiring sanding or priming. Dilute the chalk paint with water in a fifty-fifty ratio. Apply with a wide brush in irregular, overlapping strokes rather than the uniform strokes of standard paint application. While still wet, wipe back with a damp cloth in areas to create variation in coverage that produces the cloudy, layered quality of genuine limewash. Allow to dry and apply a second layer in the same manner. Seal with clear chalk paint wax or a matte water-based sealer for kitchen-appropriate durability.
3. Beadboard Panels as a Budget Backsplash
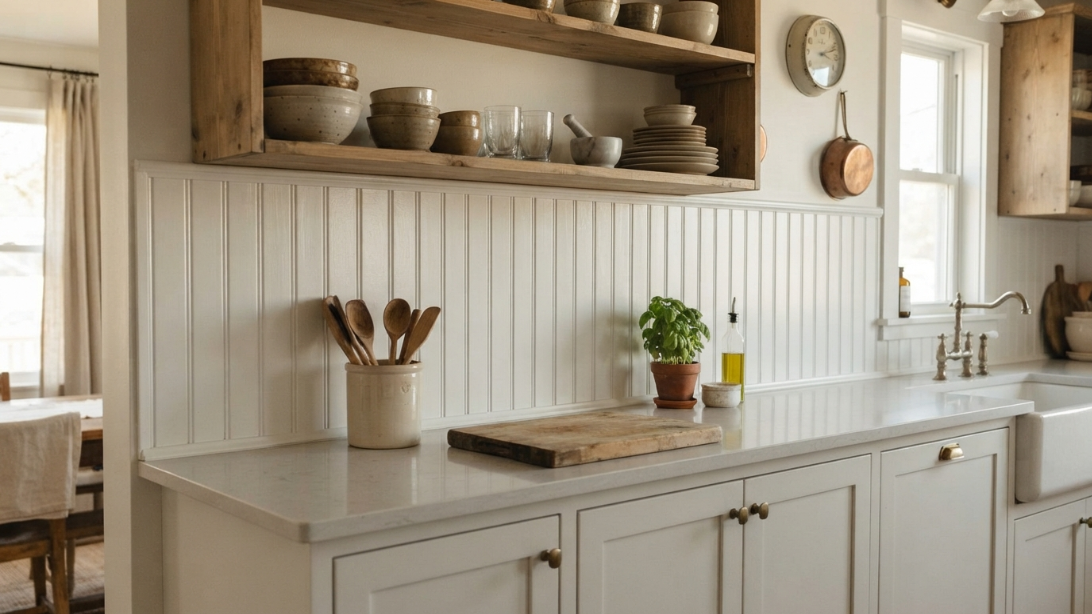
Beadboard as a kitchen backsplash provides the vertical line texture and cottage or farmhouse visual character that tile cannot replicate at a material cost of $1 to $3 per square foot for standard MDF beadboard panels from Home Depot or Lowe’s.
Installation requires cutting panels to the correct height between counter and upper cabinet with a circular saw or jigsaw, applying construction adhesive to the back, pressing firmly against the wall, and securing with small finish nails at the top and bottom edges where the counter edge and cabinet bottom will conceal the nail holes. Caulk all edges where the beadboard meets countertops, cabinets, and adjacent walls with a paintable silicone caulk, which creates the water seal that prevents the MDF from swelling with moisture exposure.
Painting beadboard for a kitchen backsplash requires a semi-gloss or high-gloss finish rather than the matte or eggshell finishes appropriate for other interior surfaces, because the gloss level determines how easily the surface wipes clean from cooking splatter. Benjamin Moore Advance in a semi-gloss finish provides excellent durability and a smooth surface that rivals factory-painted cabinetry in quality. Sherwin-Williams Emerald Urethane Trim Enamel provides comparable durability with slightly more accessibility through Sherwin-Williams locations.
Color choices for beadboard backsplash include classic white and cream for cottage and farmhouse kitchens, soft sage or dusty blue for a country kitchen with color, and a deep navy or forest green for a more dramatic interpretation of the beadboard backsplash that suits transitional and contemporary kitchens as well as purely farmhouse-adjacent ones.
4. Reclaimed Wood as a Backsplash Material
Reclaimed wood backsplash provides the organic texture, warm tone, and material character of aged wood in the specific area where it produces the maximum visual impact in a kitchen, and it does so at a cost that ranges from free, if you have access to salvage sources, to $3 to $8 per square foot for purchased reclaimed lumber.
Sourcing reclaimed wood at low or no cost is genuinely possible through sources that most people overlook: Habitat for Humanity ReStores sell salvaged architectural materials including old flooring, paneling, and lumber at significantly below market rates. Craigslist and Facebook Marketplace free sections regularly contain old fence boards, pallet wood, and architectural salvage from demolition projects. Pallet wood specifically, once the exterior slats are removed, sanded to remove splinters, and finished with food-safe oil, provides exactly the varied, aged character that reclaimed wood enthusiasts seek at zero material cost.
Installation requires the wood to be completely dry and free of any treatment that could off-gas in a kitchen environment, then cut to consistent widths or left in varied widths for a more rustic effect, and secured to the wall with construction adhesive supplemented with small finish nails at each stud. The joints between boards should be left slightly open for a plank effect or pushed tight for a more refined look depending on the kitchen’s style direction.
Finishing reclaimed wood for kitchen use requires a sealer that provides water resistance and easy cleaning without changing the character of the aged wood significantly: Rubio Monocoat in a natural finish, Osmo Polyx-Oil, and General Finishes Arm-R-Seal in a matte finish all provide appropriate protection while maintaining the wood’s aged character rather than producing the plastic-like surface of polyurethane at higher sheen levels.
5. Stone Veneer Panels for a High-End Look
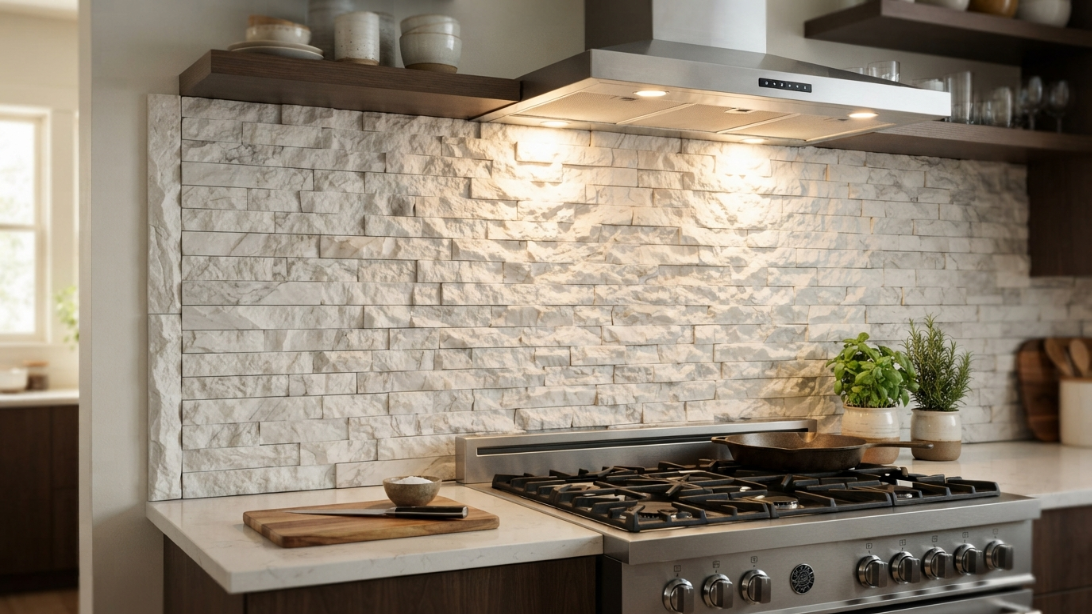
Stone veneer panels produced from real stone split to very thin sections and mounted on a mesh backing provide the visual and tactile quality of genuine stone at a fraction of the weight, cost, and installation complexity of full stone tile.
Ledger stone panels in quartzite, slate, or sandstone from MSI, EliteTile, and Emser Tile at $6 to $15 per square foot provide a stacked stone appearance with genuine stone material. The panels install similarly to tile with thinset adhesive and no spacers, and the three-dimensional variation of the stacked stone surface catches light in a way that flat tile cannot, producing the specific depth and texture that makes stone surfaces feel genuinely high-end.
White ledger stone specifically provides a bright, textural backsplash that suits farmhouse, transitional, and contemporary kitchens with equal effectiveness and that reads as significantly more expensive than its material cost from any normal viewing distance. The variation in the stone faces, some smoother and some more textured, some slightly lighter and some slightly darker within the white range, produces the organic variation that distinguishes genuine natural material from manufactured alternatives.
Installation considerations include cutting the panels with an angle grinder with a diamond blade rather than a standard tile cutter, because the three-dimensional face of the panels requires a cutting tool that can navigate the irregular surface. The corners require specific corner trim pieces that the same manufacturers produce, or the panels can be mitered at 45 degrees with the angle grinder for a clean corner that does not reveal the panel’s thickness.
6. Wallpaper Designed for Kitchen Use
Kitchen-appropriate wallpaper behind a backsplash glass panel, or applied directly to the wall with a vinyl or fiberglass-reinforced product, provides the pattern and color possibilities of fabric and wallpaper design in a kitchen-appropriate format.
Applying wallpaper behind a glass panel is the most durable and kitchen-appropriate application method: a custom-cut piece of tempered glass or acrylic mounted proud of the wall protects the wallpaper from cooking steam, splatter, and cleaning without the wallpaper itself needing to be moisture-resistant. The glass panel is mounted on standoffs at the four corners that hold it a quarter inch from the wall, and the wallpaper behind it is installed on the wall using standard paste methods. From the front, the glass is nearly invisible and the wallpaper appears to be the backsplash surface itself.
Vinyl wallpaper applied directly to the wall without a protective panel requires a specifically kitchen-rated moisture-resistant vinyl rather than standard decorative wallpaper. Brewster, York Wallcoverings, and Tempaper all produce vinyl products with sufficient moisture resistance for kitchen use when installed correctly and sealed at all edges with a clear silicone caulk before use.
Pattern selection for a wallpaper backsplash follows the same principles as any pattern-forward design decision: scale the pattern to the backsplash area rather than the full room, because a large-scale pattern that reads well on a full room wall may feel overwhelming in the contained area of a backsplash. Geometric patterns, botanical prints, and simple repeat patterns in two to three colors all provide the visual interest that makes a wallpaper backsplash a genuine design statement.
7. Mirror Tiles for Light Amplification
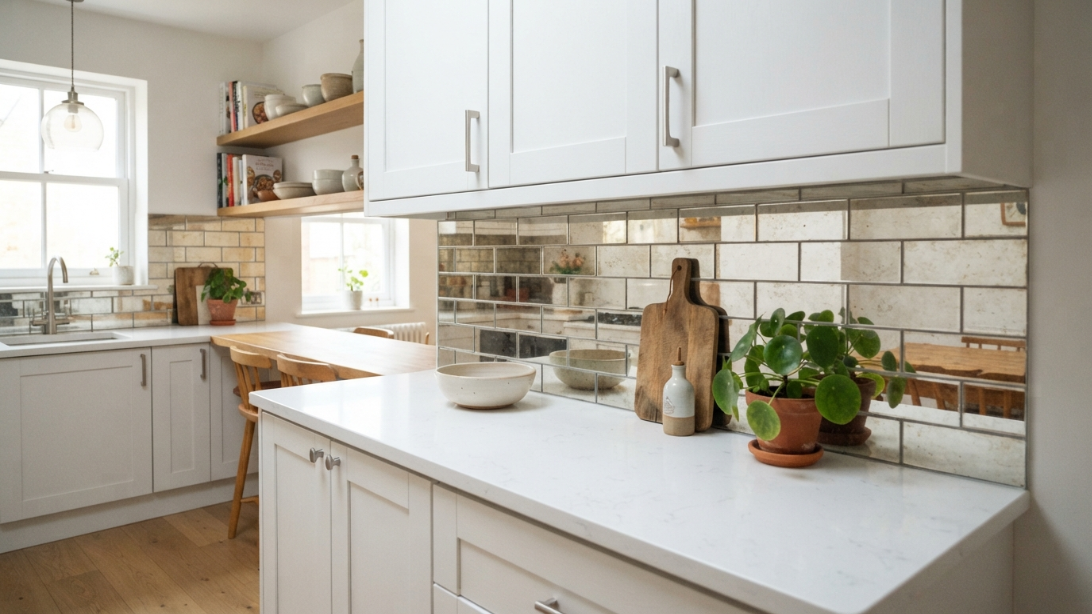
Mirror tiles used as a backsplash reflect both natural and artificial kitchen light in a way that makes a kitchen feel brighter, larger, and more visually dynamic than any non-reflective surface alternative, and they do so at a material cost of $3 to $8 per square foot for standard mirror tiles.
Antique mirror tiles with a slightly foxed, irregular silver backing produce a warmer and more sophisticated reflection than standard clear mirror, because the variation in the silver backing creates an aged quality that suits farmhouse, eclectic, and glamorous kitchen styles better than the uniformly clear reflection of standard mirror. Home Depot, Lowe’s, and Amazon all carry antique mirror subway tiles in three by six inch and four by four inch formats at $4 to $12 per square foot.
Installation of mirror tiles follows the same process as ceramic tile installation with one important modification: use mastic adhesive rather than thinset cement, because the alkaline compounds in thinset react with the silver backing of mirror and cause the backing to deteriorate, producing dark spots and eventual delamination that ruins the mirror effect. Mastic adhesive is compatible with mirror backing and is the standard specification for mirror tile installation.
Grout color selection for mirror tile backsplashes significantly affects the overall visual: a bright white grout makes the mirror tiles read as a pattern of mirror and white, which can feel busy. A gray grout that matches the silver tone of the mirror reflection allows the mirror tiles to read as a more unified reflective surface with minimal visual interruption between tiles.
8. Removable Backsplash Options for Renters
Renters face the specific constraint that permanent installation is not an option and that any backsplash solution must be fully reversible without wall damage when the tenancy ends, which eliminates most of the options above and focuses the choice on a specific category of genuinely removable products.
Contact paper in tile-print designs has improved dramatically from the early versions that looked like what they were from across the room. Current products from d-c-fix, Con-Tact Brand, and Wallpaper from the Wall provide prints sufficiently detailed and accurate in color to read as genuine tile at normal kitchen viewing distances. The critical selection criterion is choosing designs where the pattern scale and repeat match the actual dimensions of the tile format they are mimicking: a subway tile print should replicate the three by six inch format at actual scale rather than a compressed or expanded version that reads as wrong to anyone who notices.
Temporary wallpaper from Chasing Paper, Tempaper, and Wallshoppe provides the full range of pattern options available in permanent wallpaper in a pressure-sensitive adhesive format that removes cleanly from painted walls without damage when the instructions are followed. Applied to the backsplash area between counter and cabinet, temporary wallpaper provides genuine pattern interest at a cost of $2 to $8 per square foot and removes fully in under an hour when the time comes.
Removable tile stickers applied over existing tile provide a pattern transformation for renters whose kitchens have existing tile in an unappealing color or pattern. Tile Stickers from Etsy, Tile Graphics, and WallsNeedLove produce high-quality tile sticker sets in formats including Moroccan, geometric, and botanical patterns that transform existing white or beige tile completely without any permanent modification.
FAQs
What are the easiest kitchen backsplash ideas for budget renovations that require no tools?
Peel and stick tile from Aspect or StickTILE, contact paper in tile-print designs, and temporary wallpaper all require no tools beyond a utility knife for trimming. Of these, peel and stick stone or metal mosaic tiles from Aspect require the least skill to install convincingly and produce the most genuinely impressive results at normal viewing distances. The installation requires only a clean dry wall, a level line, and the patience to work section by section rather than rushing the layout.
How much does a DIY kitchen backsplash actually cost compared to professional installation?
Standard white subway tile installed professionally costs $20 to $40 per square foot including materials and labor. The same tile installed DIY costs $3 to $8 per square foot including all materials and tool rental. A standard kitchen backsplash of approximately 30 square feet therefore costs $600 to $1,200 professionally and $90 to $240 DIY, a difference of $500 to $960 that makes DIY installation one of the highest-return budget renovation investments available.
Can peel and stick backsplash tile withstand heat and moisture in a kitchen?
Quality peel and stick tile from reputable brands withstands normal kitchen heat and moisture when installed correctly and when the wall surface is properly prepared. The area directly behind a gas range with open flames is the one location where peel and stick tile should not be used, as direct flame proximity exceeds the adhesive’s heat tolerance. All other kitchen wall areas including behind electric ranges and beside sinks are appropriate for quality peel and stick products from brands like Aspect and StickTILE.
What is the easiest permanent backsplash installation for a first-time DIYer?
Beadboard panels are the most forgiving permanent backsplash installation for beginners because they require only straight cuts, no special adhesive technique, and provide a large margin of error at the edges where caulk conceals any imperfect fitting. Standard ceramic subway tile is the second most forgiving because the regular grid pattern makes layout straightforward and mistakes on individual tiles are easy to remove and replace before the adhesive cures. Ledger stone panels are the most difficult because cutting the three-dimensional face requires an angle grinder and more experience with power tools.
How do I make a cheap backsplash look expensive?
The variables that make any backsplash look expensive regardless of material cost are consistent grout lines, clean edges at all transitions, a thoughtful layout that avoids tiny partial tiles at the visible ends, and a grout color that suits the tile rather than defaulting to standard white. A basic white subway tile installed with perfect layout, consistent one-eighth inch grout lines, and a warm gray grout looks more expensive than a premium tile installed carelessly. Execution quality matters more than material price in how a backsplash reads from across the room.
Conclusion
A kitchen backsplash that looks genuinely good does not require a tile budget that competes with a car payment or a contractor schedule that disrupts the kitchen for a week. It requires choosing the approach that suits your skill level, your budget, and your kitchen’s specific visual needs, and then executing it with enough patience to do it right. Start with the surface prep, plan the layout before committing to anything permanent, and give yourself permission to choose the genuinely removable option if permanence feels like the wrong commitment right now. Which backsplash approach is going on your kitchen wall?